Upgrade Kofax Kapow Tutorial
We all know that the upgrade process for Kapow Kofax has never been easy or somehow straight forward, it requires a bit of extra work to be done in order to make it functional. We are sure that you haven’t landed on this page by mistake and you’re not here to complain about the software itself. We know that the whole upgrading process can be a bit frustrating, no clear documentation is provided by Kofax or maybe a simple shell script that can facilitate the upgrade process. No forums or tutorials about this software or at least a troubleshooting guide. We are aware that Kapow is not a widely spread software so we’ve decided to create this small tutorial about how to upgrade Kapow, in this particular example we’ll try to upgrade Kofax Kapow 9.7 to 10.3 on CentOS Linux, we could say a major update. Hypothetically we think that this tutorial can be easily used for newer Kapow versions, we haven’t tested yet but please feel free and give it a try.
Table of Contents
Upgrade Kofax Kapow
Stop Kapow Robots
Stop Tomcat
Backup MySQL Databases
Cleanup Kapow References
Download Kapow
Start Tomcat
Start Kapow Management Console
Access Kapow Management Console
Start Kapow Robots
Kapow Configuration Files
Troubleshooting
Stop Kapow Robots (RoboServer)
Our first step begins by stopping Kapow Robots (RoboServer) and Tomcat web server, we can’t perform the upgrade while these processes are running.
Let’s start by identifying what ports are used by Kapow Robots, we can find this out by piping ps results to grep like shown in the example below.
ps aux | grep -in "RoboServer -mcUrl"
Our console output should look similar to this:
87:root     14291  0.0  0.0 113176  1468 ?        S    Jun27   0:00 /bin/sh /opt/kapow/bin/RoboServer -mcUrl kapowhost.dummy-domain.com -p 50000 -cl http://kapowhost.dummy-domain.com
90:root     14391  0.0  0.0 113176  1468 ?        S    Jun27   0:00 /bin/sh /opt/kapow/bin/RoboServer -mcUrl kapowhost.dummy-domain.com -p 50001 -cl http://kapowhost.dummy-domain.com
93:root     14507  0.0  0.0 113176  1468 ?        S    Jun27   0:00 /bin/sh /opt/kapow/bin/RoboServer -mcUrl kapowhost.dummy-domain.com -p 50002 -cl http://kapowhost.dummy-domain.com
108:root     21668  0.0  0.0 112840  1004 pts/0    S+   23:07   0:00 grep --color=auto -in RoboServer -mcUrl
All the information that we need from the output above is the full path of shell script that these robots are running from, /opt/kapow/bin/RoboServer, the domain name kapowhost.dummy-domain.com and also the -p (port) argument that each individual robot uses. We can now see that we have three running robots, one using port 50000, second robot is using port number 50001 and finally the third one using port 50002.
All good so far, but let’s have a quick look over /opt/ folder by listing the content of it:
[root@kapowhost 06:42:35 ~]# ls -la /opt/
total 900484
drwxr-xr-x. 10 root     root          4096 Jun 26 09:59 .
dr-xr-xr-x. 20 root     root          4096 Jun 26 09:47 ..
lrwxrwxrwx   1 root     root            28 May 10 09:59 kapow -> /opt/Kapow_9.7.6_x64/
drwxr-xr-x  12 root     root          4096 May 10  2018 Kapow_9.7.3_x64
drwxr-xr-x  12 root     root          4096 Sep  6  2018 Kapow_9.7.6_x64
lrwxrwxrwx   1 root     root            12 Jun 23  2017 tomcat -> /opt/tomcat9
drwxr-xr-x.  8 root     root          4096 Jun 28  2017 tomcat9
From the above listing we can notice that we have two symlinks, one for Kapow kapow -> /opt/Kapow_9.7.6_x64/ indicating what Kapow version we are currently running and the other one is for Tomcat tomcat -> /opt/tomcat9.
Kapow symlink will help us later to keep our current setup intact, we can easily revert back to 9.7.6 version whenever we want or just in case our new 10.3 deployment fails.
Let’s move now to the next major step with our Kapow Upgrade tutorial by stopping these robots one by one. Please note that we’ll be using ShutDownRoboServer script from /opt/kapow/bin/ folder and not RoboServer, this one is used purely for starting the robots.
/opt/kapow/bin/ShutDownRoboServer kapowhost.dummy-domain.com 50000 2
/opt/kapow/bin/ShutDownRoboServer kapowhost.dummy-domain.com 50001 2
/opt/kapow/bin/ShutDownRoboServer kapowhost.dummy-domain.com 50002 2
A successful console output for each shut down command should look like this one:
--> Wrapper Started as Console
Launching a JVM...
WrapperManager: Initializing...
<-- Wrapper Stopped
Stop Tomcat
We've managed to stop Kapow Robots on our previous step but now we need to stop Tomcat as well, this way we'll make sure that no other changes or users will affect our Database Backups, explained on the next step.
Let's run the next command that'll stop Tomcat, remember we have a symlink in place for this as well, tomcat -> /opt/tomcat9:
/opt/tomcat/bin/catalina.sh stop
If we get this output on our console it means that Tomcat has been stopped:
Using CATALINA_BASE:   /opt/tomcat9
Using CATALINA_HOME:   /opt/tomcat9
Using CATALINA_TMPDIR: /opt/tomcat9/temp
Using JRE_HOME:        /
Using CLASSPATH:       /opt/tomcat9/bin/bootstrap.jar:/opt/tomcat9/bin/tomcat-juli.jar
Backup MySQL Databases
Even if we have a recent backup for Kapow's databases we need to take a fresh one at this stage, is not about best practices or any compliance we just want to make sure that we won't loose any data collected or changes until this point. By running next commands on our terminal window we'll get three fresh backups for each database that Kapow uses, we can dump all three in a single file as well but we'll keep the backup process as simple as possible:
# cd /path/to/mysql/backups/
# mysqldump KAPOW_MC > KAPOW_MC.sql;
# mysqldump logdb > logdb.sql;
# mysqldump objectdb > objectdb.sql;
Excellent, now we have backups for our databases and we can proceed with confidence to then next step.
Cleanup Kapow References
Before installing a new Kapow version we have to perform some cleanup tasks, by cleanup we mean that we need to drop KAPOW_MC database and to recreate a blank one, to remove the content from Tomcat's webapps folder and finally to remove Kapow's symlink kapow -> /opt/Kapow_9.7.6_x64/. No worries all other custom configs will be safely kept as usual within users home folders, ~/Kapow and ~/.Kapow.
Let's drop KAPOW_MC databases, this database holds information about Kapow's Management Console, we don't want to keep it as new features will be introduced with a newer version. We'll drop it and we'll create a blank one in a single command line as shown below.
mysql> DROP DATABASE KAPOW_MC; CREATE DATABASE KAPOW_MC;
Next bit is about removing the content of webapps folder from Tomcat, more precisely ManagementConsole* (folder and war file) and nothing else.
rm -rf /opt/tomcat/webapps/ManagementConsole*
And finally as part of our cleanup process we have to remove the exiting symlink for Kapow.
rm -f /opt/kapow
Please make sure that you won't use a trailing slash at the end of the command otherwise the symlink won't be removed.
Download Kapow
We've stopped all running processes, backed up our databases and made some housekeeping in terms of files and references to the old Kapow version, now is the time to download the new version and preparing it.
Log into Kofax portal and download Kofax Kapow 10.3.X to your local machine, you can't download it directly to the server as it requires authentication and a small web interaction so we'll keep it simple once again. Once you have the new version on your local machine let's upload this file, for example Kapow_10.3.0.1_x64.tar.gz to our kapowhost.dummy-domain.com server via scp for Mac users. You can do it different ways, scp, rsync, ftp etc. it doesn't matter as long we can copy it.
Once uploaded let's make sure that we have the archive in the right place, more precisely present to our /opt/ folder, this is not a must but is nice to have a proper structure in place for all 3rd party software installations like Kapow for example.
mv /location/of/the/archive/Kapow_10.3.0.1_x64.tar.gz /opt/
The next step is to decompress Kapow like show in the example below, we'll use for our tutorial version 10.3.0.1 as you can see but you can adjust this accordingly.
tar -zxvf /opt/Kapow_10.3.0.1_x64.tar.gz
Once the decompression is completed it's time to create back the symlink pointing to our new version this time:
ln -s /opt/Kapow_10.3.0.1_206_x64/ /opt/kapow
We're now one step closer to finish our Kapow Upgrade, but first we have to copy the war file from Kapow WebApps to Tomcat's webapps.
cp /opt/kapow/WebApps/ManagementConsole.war /opt/tomcat/webapps/
Let's check quickly if the content of Tomcat's webapps folder.
[root@kapowhost 16:51:57 ]# ls -la /opt/tomcat/webapps
total 110872
drwxr-xr-x. 3 root root      4096 Jun 26 10:04 .
drwxr-xr-x. 8 root root      4096 Jun 28  2016 ..
-rw-r--r--  1 root root 113510389 May  2 16:02 ManagementConsole.war
Nice, we're now in good position to carry on with our next task were we'll start Tomcat.
Start Tomcat
To start Tomcat we'll use the same shell script that we used to stop it, catalina.sh but specifying that we're starting the service.
/opt/tomcat/bin/catalina.sh start
Our console output should look like this once Tomcat started successfully:
Using CATALINA_BASE:   /opt/tomcat9
Using CATALINA_HOME:   /opt/tomcat9
Using CATALINA_TMPDIR: /opt/tomcat9/temp
Using JRE_HOME:        /
Using CLASSPATH:       /opt/tomcat9/bin/bootstrap.jar:/opt/tomcat9/bin/tomcat-juli.jar
Tomcat started.
By listing now Tomcat's webapps folder once again we should notice that a new folder has been automatically created as show in the example below, that's a good sign meaning that ManagementConsole.war application has been decompressed and deployed successfully.
[root@kapowhost 17:51:57 ]# ls -la /opt/tomcat/webapps
total 110872
drwxr-xr-x. 3 root root      4096 Jun 26 10:04 .
drwxr-xr-x. 8 root root      4096 Jun 28  2016 ..
drwxr-x---  8 root root      4096 May  2 17:22 ManagementConsole
-rw-r--r--  1 root root 113510389 May  2 16:02 ManagementConsole.war
We can now test if Tomcat web server is running properly on our server by opening a new browser window and accessing Tomcat's default page:
http://kapowhost.dummy-domain.com:8080/
If Tomcat started without any errors we should be able to see the default page:

Start Kapow Management Console
Knowing now that Tomcat is fine being up and running we can start Kapow Management Console via nohup like this:
nohup /opt/kapow/bin/RoboServer -MC &
Access Kapow Management Console (Web UI)
Let's check now if Kapow Management Console web interface is accessible, we can use the same browser windows / tab:
http://kapowhost.dummy-domain.com:8080/ManagementConsole/
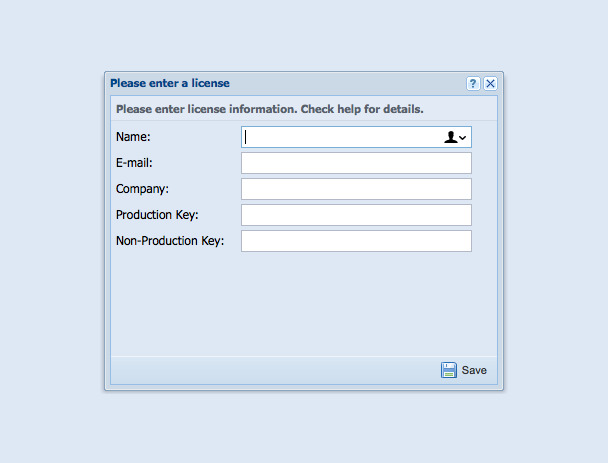
Our first hit will be obviously the license page, please fill up all required fields:
If we have managed to access Kapow Management Console via http://kapowhost.dummy-domain.com:8080/ManagementConsole/ and to get the license window then we're good, this means basically that our upgrade / installation Kapow process went fine, we're now running Kapow 10.3.
Start Kapow Robots
Finally we're on our very last step of this Kapow tutorial were we have to start the back the Robots that we've stopped on the first step. You can start anytime more than three Robots but don't forget to increment the port number, whitelist those ports on firewall and also keep an eye on server resources, especially RAM memory as Java uses a lot.
On this tutorial we'll resume to start only three Robots as show below:
nohup /opt/kapow/bin/RoboServer -mcUrl kapowhost.dummy-domain.com -p 50000 -cl http://kapowhost.dummy-domain.com &
nohup /opt/kapow/bin/RoboServer -mcUrl kapowhost.dummy-domain.com -p 50001 -cl http://kapowhost.dummy-domain.com &
nohup /opt/kapow/bin/RoboServer -mcUrl kapowhost.dummy-domain.com -p 50002 -cl http://kapowhost.dummy-domain.com &
Kapow Configuration Files
Just a last word in the end of our Upgrade Kofax Kapow tutorial, in case you need to tweak Kapow configs make sure that all your changes are carried out using Kapow's default configuration folder located under your user home folder, more precisely ~/.Kapow/10.3.0.1_206/Configuration. We're sure that by using a VM or a remote server in general for example you'll never ever be able to upload JDBC drivers for MySQL via web interface. Make all necessary changes by editing directly the file called mc.settings, save your changes, restart MC and carry on. We know is not a major tip but can save you a ton of time.
Troubleshooting
If you need to upload the JDBC Driver using the web interface then you need to make sure that the upload is allowed. In order to activate this option please go to:
$ /opt/tomcat/webapps/ManagementConsole/WEB-INF
Open the file Configuration.xml using your preferred text editor like in the example below:
$ vi Configuration.xml
Search for jdbcDriverUpload and replace LOCALHOST from value filed with ANY_HOST.
    <bean id="securityConfiguration" class="com.kapowtech.mc.config.SecurityConfiguration">
        <property name="allowScriptExecution" value="false"/>
        <!-- <property name="jdbcDriverUpload" value="LOCALHOST"/> --> <!--Allowed values: NONE, LOCALHOST, ANY_HOST -->
        <property name="jdbcDriverUpload" value="ANY_HOST"/>
    </bean>
Once that is in place just restart Tomcat and upload your JDBC driver using Management Console.